


How to Lay Out a Herringbone Pattern: A Step-by-Step Guide
21 Jun 2025
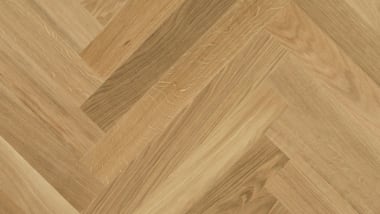
Herringbone is one of the most iconic and visually captivating wood flooring patterns. Its interlocking “V” layout adds movement and a touch of refined geometry that complements both modern and traditional interiors.
Whether you're planning to install premium Havwoods herringbone products like Cedro Character 120mm Herringbone or simply want to master the craft, this guide will walk you through how to lay out a herringbone pattern with accuracy and style.
Why Choose a Herringbone Pattern?
Before diving into the step-by-step installation, it's worth understanding why herringbone flooring has earned such a lasting place in interior design. The aesthetics are dynamic and timeless, giving spaces a unique sense of movement and visual texture.
Herringbone is particularly effective in adding visual interest to both compact areas like hallways and expansive open-plan rooms. It also has the benefit of working seamlessly with a variety of design styles, from minimalist Scandinavian to ornate classic interiors. Perhaps most importantly, installing a herringbone floor can significantly enhance the perceived and actual value of a property, making it a wise long-term investment.
Step 1: Plan Your Layout
The most important part of installing a herringbone pattern is thorough preparation. To begin, you’ll need to choose the most visually impactful starting point. Typically, this is the center of the room. Use a chalk line or laser level to identify the midpoint along the room’s longest wall.
Once found, snap a perpendicular line to form a perfect cross. This serves as your working quadrant and ensures a symmetrical layout throughout the space.
Before applying any adhesive, lay down a few rows of planks without securing them to preview the alignment.
This “dry lay” allows you to verify that the pattern is centered properly and lines up with any architectural features or focal points, such as fireplaces or large windows. Make adjustments as needed to avoid awkward or asymmetrical final rows.

Step 2: Prepare the Subfloor
Proper subfloor preparation is essential for a durable and visually flawless result. First, ensure that the surface is completely level.
If there are any uneven areas, use a self-leveling compound to correct them. The subfloor must also be thoroughly clean and dry, so vacuum the entire surface and remove any debris or dust that could affect adhesion. Additionally, make sure the subfloor is solid and does not squeak or shift under pressure. If you encounter any flexing or loose areas, secure them before moving forward.
If you're installing herringbone over underfloor heating, as many Havwoods engineered wood products are designed to accommodate, it is important to check that the temperatures are within acceptable ranges. Allow the wood to acclimate in the room for a minimum of 72 hours.
Step 3: Gather the Right Materials
To install a herringbone floor, you'll need a range of tools and supplies. These include engineered herringbone flooring boards, a flooring adhesive suitable for both wood and your specific subfloor type, a notched trowel for spreading adhesive, and a tape measure for accurate alignment.
You’ll also require a chalk line or laser level, a rubber mallet for gently securing boards, and spacers to maintain expansion gaps. For cutting-edge pieces, a flooring saw or miter saw is essential. Finally, don’t forget a good pair of knee pads. This job takes time, and comfort matters.

Step 4: Apply Adhesive and Begin Installing
Once your tools and materials are ready, it’s time to apply the adhesive. Spread it in small sections, typically about three feet by three feet, using your notched trowel. Begin laying your planks along the chalk layout lines, starting from the center and working outward.
Fit the tongue of each plank into the groove of the adjacent piece, tapping lightly with your rubber mallet to ensure a snug fit. Continue alternating the direction of each plank to form the iconic “V” pattern that defines herringbone flooring.
As you work, take care to check alignment frequently. Even a minor shift in angle early on can lead to a visibly skewed pattern by the time you reach the edges of the room. Precision is key, so make corrections immediately if something looks off.
Step 5: Cutting the Edge Planks
With the central area complete, you’ll now move on to trimming and fitting the edge planks. Carefully measure each piece, making sure to account for a 10 to 15mm expansion gap around the perimeter of the room. This gap is crucial for allowing the wood to naturally expand and contract with changes in temperature and humidity.
Use a flooring saw or jigsaw to make clean, accurate cuts. Once all edge pieces are installed, cover the expansion gaps with appropriate trim or skirting boards for a polished and professional finish.
Step 6: Let the Floor Set
After installation is complete, it's essential to allow the adhesive to cure fully. Most adhesives require a curing time of at least 24 hours. During this period, avoid walking on the floor. This ensures a strong bond between the flooring and the subfloor. Once cured, remove any spacers you placed around the edges and install your final moldings to secure the floor.
Step 7: Finishing Touches
Even though most Havwoods herringbone flooring comes pre-finished, such as the Cedro Character 120mm with its durable UV oiled surface, a post-installation clean is always recommended. Use a wood floor cleaner that’s approved by Havwoods to remove any remaining adhesive residue or dust. To protect your new flooring and prolong its life, add felt pads to the bottom of furniture and avoid dragging heavy objects across the surface.
Additional Tips for Success
When laying out a herringbone pattern, consider the proportions of the room. In smaller rooms, narrower herringbone blocks like the 120mm width used in Havwoods’ Cedro Character line offer a more balanced and elegant look. In contrast, larger rooms can comfortably accommodate wider blocks without appearing crowded.
It’s also worth considering the direction of natural light in the room. Align the herringbone pattern so that the “V” shape leads toward the light source or a key focal point. This enhances the visual flow and depth of the space.
For larger projects or irregular room shapes, professional guidance can be extremely beneficial. Havwoods offers expert support and technical advice for every stage of the flooring process, including underfloor heating compatibility, product selection, and installation techniques.
Why Choose Havwoods for Herringbone?
Havwoods stands out in the flooring industry for its premium materials, expert craftsmanship, and designer-focused approach. Their herringbone flooring is constructed with multi-layered engineered wood, offering both strength and long-term stability. The wood used is sustainably sourced European Oak, which brings authenticity and warmth to any interior.
With options like next-day sample delivery, a wide variety of finishes, and a commitment to technical support, Havwoods makes it easier than ever to create beautiful, long-lasting herringbone floors.